Barbequing Recipes
|
|
Cooking with Guinness
A little Guinness makes everything better. If you're "afraid of the dark"
you can substitute a lighter brew, but some of these
recipes just won't be the same without a drop of the black
stuff. Everything from meat to desserts and did you know
Guinness is about the lowest calorie beer out there!
Make your own sausage
It is fun, easy and tastes so much better than what you buy
at the store. Sausage is a perfect food to combine with the
BBQ as you can easily smoke sausages and nothing tastes
better than grilled sausage. |
Table of Contents
|
RUBS & MARINADES
|
|
Chicken
|
|
I use butter and a little salt and pepper. Get the butter
under the skin if you can. Truffle butter makes a great
addition if you can find it. Alternatively you can use your
favorite barbeque sauce. I like Sweet Baby Ray's.
In any case, get the rub or sauce under the skin as well as on
the skin to get flavor into the meat.
|
|
Turkey
|
|
With turkey I like to keep it simple. I soften some salted
butter, add a tablespoon of sage, and rub it under the skin,
getting into the legs and wings as much as possible. A wooden
spoon is helpful for loosening the skin. I rub a little more
of the butter on the outside of the skin and call it good.
Truffle butter also works well here.
|
|
Fish
|
|
Just a little fresh dill and lemon juice on salmon and then
cook it skin side down over cedar chips or on a cedar plank.
Another option is a sugar and salt cure. (see below)
|
|
Pork
|
|
Coming Soon
|
|
Beef
|
|
Coming Soon
|
MEATS
|
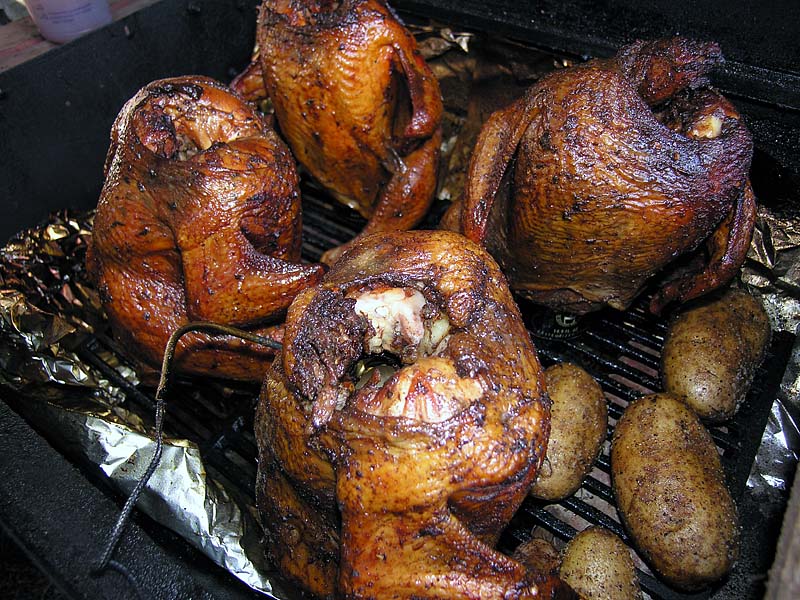
Two Day Beer Butt Chicken & Baked Potatoes
|
Day One
Morning |
Recommended Products |
Shopping List
The Beer
4 tall cans of beer (I recommend Guinness, your taste may vary)
2 regular cans of basic beer (a good ale)
The Brine
1 cup sea salt
1 cup brown sugar
2 tablespoons cinnamon
4 bay leaves
1 gallon of water
Tall beer #1
The Rub
1.5 cups of dark brown sugar
3 tablespoons of paprika
2 tablespoons of garlic powder
1 tablespoon of chili powder
The Baste
1 cup apple cider vinegar
1/4 cup of cooking sherry
2 tablespoons of Worcestershire sauce
1 tablespoon of sesame oil
The Meat
2-4 Large whole chickens
Think about how much room you have on the grill. I did four chickens on my Char-Griller . I could have put one more on, but it would have been very crowded. Give them some room to allow the smoke to circulate. You might want to start with one or two. The beer can holders shown to the right . I could have put one more on, but it would have been very crowded. Give them some room to allow the smoke to circulate. You might want to start with one or two. The beer can holders shown to the right are very handy for creating a stable base. are very handy for creating a stable base.
Misc. Supplies
5 gallon plastic bucket
1 large plastic spray bottle
Clear garbage sacks
Meat thermometer with probe
Wood chips (fruit wood is good)
1-2 bags of lump charcoal or briquettes
1 onion
2-4 baking potatoes
Evening
Making the Brine
Combine all the brine ingredients in a large stainless (not aluminum) pot. Set tall beer can aside. Bring to a boil and let simmer for about 10 minutes. Remove from heat and let cool to room temperature.
Open tall beer #3 - enjoy and save the can
While waiting for the brine to cool, clean a five gallon bucket and line it with a clean clear plastic bag.
Remove giblets and necks from 2-4 whole large chickens.
Rinse chickens in cold water. Slide fingers under skin and loosen from both sides and as far into the legs, thighs and wings as possible. Don't rip the skin.
Pour brine into bucket when cool and add 3 more gallons of cold water.
Add chickens.
Secure the top of the bag so little or no air remains.
Put the bucket into the refrigerator for 6-12 hours.
Open tall beer #4 - enjoy, save the can
Making The Rub
1.5 cups of dark brown sugar
3 tablespoons of paprika
2 tablespoons of garlic powder
1 tablespoon of chili powder
Mix all ingredients in a small bowl and use your fingers to blend them together. Cover and set aside.
|
|
Day Two
Morning |
Recommended Products |
Put your wood chips in a bucket or bowl of water to soak. They'll need at least an hour to absorb water.
Remove the chicken from the brine. Rinse thoroughly inside and out to remove as much of the brine as possible. Set the chicken out to drain. When the chicken is fairly dry, pat with paper towels to soak up any extra moisture.
Apply rub under the skin and work it into all areas and as far up the legs and wings as you can reach. Do this with all the chickens.
Rub the entire chicken inside and out with vegetable oil until well coated. Use more rub on the inside and outside of the chicken until well coated.
Using a punch can opener, open the top of each beer can so you can remove the plastic ball (when using Guinness cans) and allow more open area on the can top. Push the sharp edges down into the can.
Quarter an onion, putting a quarter into each can.
Open the two small cans of beer and fill each large can about halfway.
Add two tablespoons of Worcestershire sauce to each can.
Add a splash of cooking sherry to each can.
Add two tablespoons of apple cider vinegar to each can.
Tuck the chicken wings behind the chicken.
Carefully insert each can into the chickens so that the legs and can bottom form a tripod, or use one of the beer can chicken devices shown to the right.
If you're using a remote thermometer (highly recommended and shown to the right), insert the probe into the thigh of the chicken avoiding the bone.
Fill your chimney starter with charcoal and light up. No lighter fluid!!
Line the inside of your grill with aluminum foil to protect and catch drippings. You can put an aluminum drip pan in, but they may not catch all the fallout if you're doing several chickens.
The Baste
Mix up your baste and pour it into the large spray bottle. Shake before using.
1 cup apple cider vinegar
1/4 cup of cooking sherry
2 tablespoons of Worcestershire sauce
1 tablespoon of sesame oil
Add coals when ready to firebox. Monitor main grill temperature until it reaches about 225 degrees.
Open lid to main grill and place the chickens on the grill surface so that they don't touch each other or the lid of the grill. Make sure they are sitting in a stable position and won't fall over. Gently close the lid. Turn on remote thermometer and set for 180 degrees or for Chicken.
Add some of the wood chips, a small handful with the water squeezed out is about right. Continue to add chips every half hour for a couple hours an then hourly. I don't how much more smoke takes effect after the first few hours, but it smells good and looks impressive.
At this point most of the work is over. Add charcoal either already started in the chimney starter or add 10-12 chunks to the firebox. I have better luck adding already ignited charcoal. Be careful when pouring new charcoal in to not kick up to much ash. Monitor the temperature to keep the main grill area at about 225. As a rough rule of thumb, I spray the chicken lightly with the baste mixture when I add more charcoal or about every 45 minutes to an hour.
The Potatoes
These are pretty easy. Clean them well and poke a few holes about 1/4-1/2" deep. Then rub them with vegetable oil. Then rub a bit of sea salt and pepper on them. Put them on the grill near the firebox opening with about an hour left before the chicken is done. Turn them occasionally when you spray the chicken so they cook evenly. They'll cook faster if you put them closer to the coals.
Finishing Up
Take the chickens off the grill when done. Be careful of the hot liquid. Let them rest for about 15 minutes before pulling them off the can. They should cut up easily and the meat will be moist and falling off the bone.
I find that
meat shears are perfect for cutting apart the turkey quickly. Serve with your favorite sauce on the side, you may not need it because the rub flavor will have penetrated the meat.
|
|
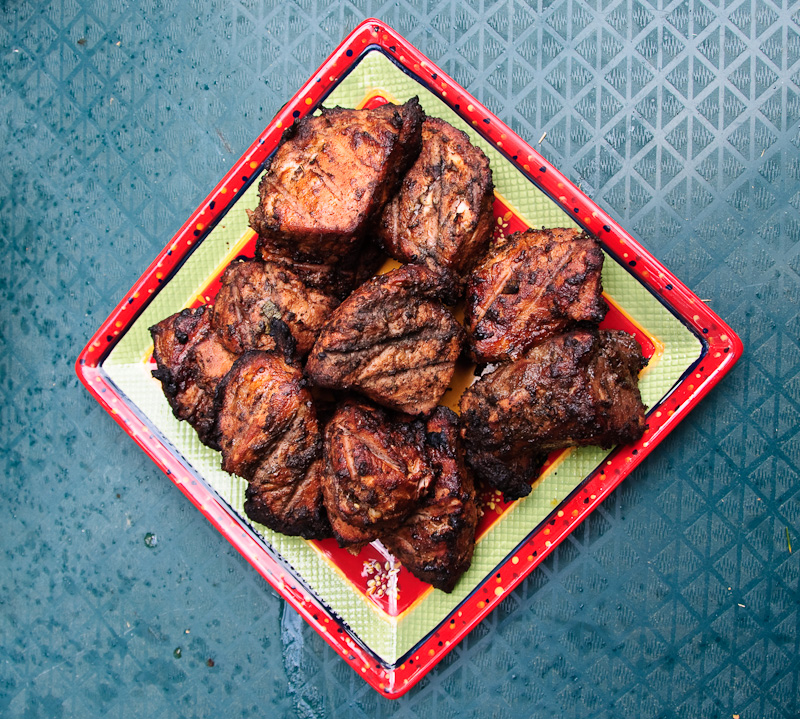
Jerk Chicken and/or Pork
|
|
| Recipe |
Recommended
Products |
| OK, you want to do this right, right? Don't use those old spices in the rack. Get some fresh ones, preferably from a place that carries fresh spices.
Look for local Island cooking stores. Don't use canned juice, squeeze it yourself. It makes it taste better and you'll feel like you put more into it. Whenever possible, use the most potent flavors in this type of cooking. 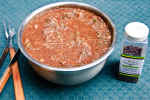
Dry Ingredients
2 tablespoons freshly ground
allspice
2 pimento leaves (if available)
2 tablespoons dried thyme
3 teaspoons cayenne pepper
3 teaspoons freshly ground black pepper
3 teaspoons ground sage
2 teaspoons cumin
2 teaspoons coriander
2 teaspoons freshly ground nutmeg
1.5 teaspoons freshly ground cinnamon (about a stick)
2 tablespoons sea salt
2 tablespoons garlic powder
1 tablespoons dark brown sugar or dark molasses
Wet Ingredients
1/4 cup olive oil
1/4 cup low salt soy sauce
3/4 cup cider or white vinegar
2 tablespoons dark rum
1/2 cup fresh squeezed orange juice
Juice of one fresh squeezed lime
2 tablespoons fresh grated ginger
1 scotch bonnet or habanero pepper, seeded and chopped. (the weak of heart and tongue may substitute jalapeno or other peppers, the really brave will leave in the seeds)
1 cup chopped white onion
3 chopped green onions
2-4 cloves of freshly minced garlic
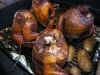
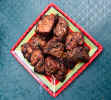
4-6 skinless pounded or well perforated (allows more marinade to penetrate) chicken breasts or pork loins
(make shallow scores across the meat) or both.
I found some
pork sirloin trim parts for a very low price. Basically they
are chunks of
pork that are exceptional for this dish. (see pictures)
If you want to use whole chickens, use two and rub the
chicken with lime juice and some salt. Then get the marinade
under the skin as much as possible and then put remainder
over the outside. Refrigerate overnight.
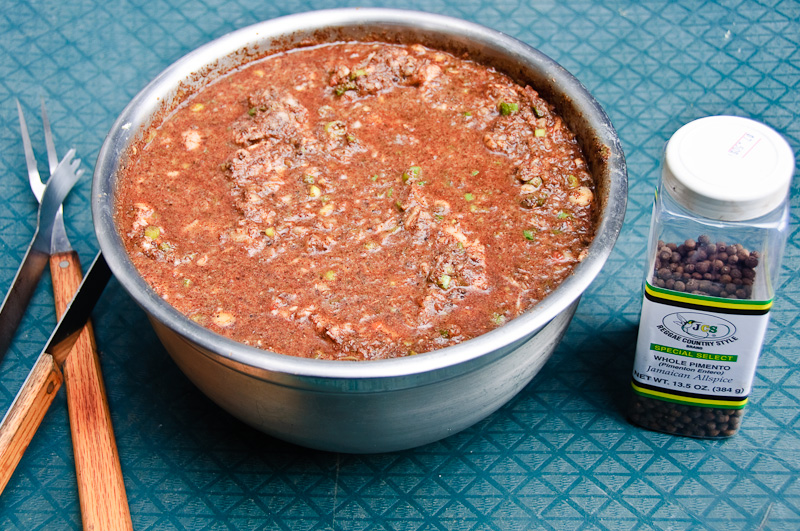
1. combine all dry ingredients in large bowl. With wire whisk slowly add the olive oil, soy sauce, vinegar, orange juice, and lime juice.
2. Add the pepper, onion and green onions and mix well.
3. Add the meat, cover and marinate for 6 hours minimum, overnight is best. I've let it sit for 3-5 days, and it just gets better.
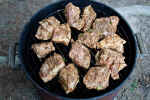
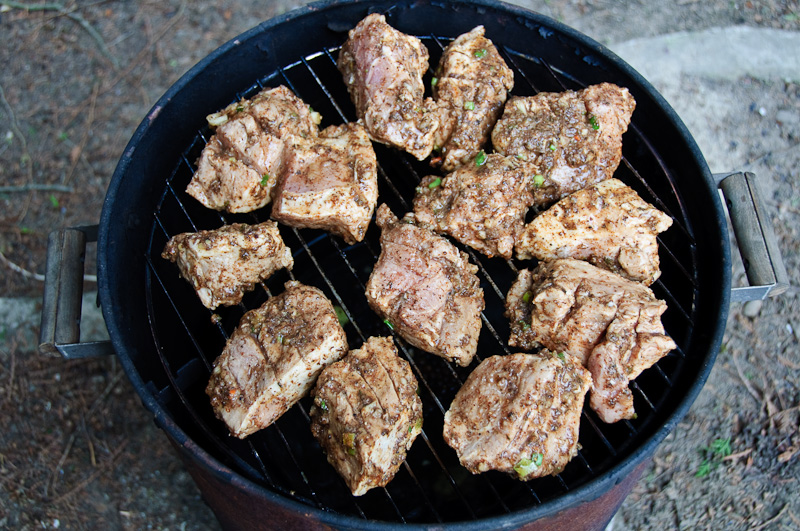
Slow cooking with smoke (best option)
Remove meat from marinade, put on grill and add some
presoaked
pimento or if you can't find any, apple, oak or alder wood chips to the coals. If
you can find allspice berries , add a handful of these
(presoaked) to
the wood chips. While cooking, baste with marinade or use a
water pan with a few whole allspice berries added to the water. If
you use a water pan, you won't need to baste. Slow cook until at the proper temperature for chicken or pork. Use a grilling thermometer with a probe. , add a handful of these
(presoaked) to
the wood chips. While cooking, baste with marinade or use a
water pan with a few whole allspice berries added to the water. If
you use a water pan, you won't need to baste. Slow cook until at the proper temperature for chicken or pork. Use a grilling thermometer with a probe.
Heat (to boiling for 5-10 minutes) leftover marinade and serve with
rice or bread for dipping.
Grilling
Remove meat from marinade, grill on outdoor grill, 6-8 minutes each side.
While grilling, baste with marinade.
Heat (to boiling for 5-10 minutes) leftover marinade and serve with
rice or bread for dipping.
Rice and Peas (Rice With Coconut and Red Beans)
Perfect accompaniment for Jerk
2 teaspoons vegetable oil
1 cup water
2 cloves of garlic, minced
2 green onion, thinly sliced
2 cups uncooked white rice
1 14-ounce can coconut milk, (shake well)
1 tablespoon dried or fresh thyme
1 scotch bonnet pepper
3 cups cooked small red beans (1 1/2 cups dried beans or 2
15-ounce cans, drained)
1/4 teaspoon of salt
In a heavy saucepan with a tight-fitting lid, heat
oil over medium heat. Add garlic and green onion and cook just
until softened. (3-4 minutes)
Add rice, coconut milk, water, thyme, scotch bonnet, beans and salt.
Bring to a boil over high heat, then stir well, reduce heat to
low, cover tightly and cook without disturbing for about 25
minutes, until liquid has been absorbed and rice is very soft.
Salt and pepper to taste.
Tips
-
Pimento wood is going to give you the most authentic
flavor. There only appears to be one
source in the US, probably due to customs rules.
-
If you can find whole
allspice berries,
these can be used to add flavor to the smoke. Just use a
handful in the wood chips. Presoak them and they'll last
longer.
-
The longer it marinates the better it tastes and the more tender it gets.
-
This is industrial strength, you might want to cut the dry spices and pepper in half the first time around.
-
Above all, DON'T RUB YOUR EYES (or other sensitive body parts) if there is any marinade on your hands. This stuff is bloody hot!
The longer it sits, the hotter it gets.
-
Leftovers make great sandwiches when sliced
thin on a good French bread.
|
|
Pork Shoulder (skin on)
I forgot to take pictures, maybe next time, but they looked wonderful. |
|
Recipe
|
Recommended Products |
| I picked up two pork shoulders in a package at Winco. I've heard varying opinions of their meat, but these looked and ultimately tasted good and were much cheaper than anywhere else.
I left the skin on the meat and put a paprika based rub with a lot of brown sugar and hot pepper. I let them sit overnight in the refrigerator before throwing them on the smoker.
The Beer
I'd estimate about a six-pack of Tecate. Three for the smoker and three for me. It wouldn't hurt to have some extra for a hot day.
Make sure you have some lime or lemon chunks or juice to
put in the drinking beer, otherwise this is pretty tasteless stuff.
The Rub
1.5 cups of dark brown sugar
3 tablespoons of paprika
2 tablespoons of garlic powder
1 tablespoon of chili powder
2 teaspoons of cayenne pepper
The Baste
1 cup apple cider vinegar
1/2 cup of beer
1/4 cup of cooking sherry
2 tablespoons of Worcestershire sauce
1 tablespoon of sesame oil
I laid these directly on the cast iron grill skin side up, with a drip pan beneath. I put about 6 bricks in the bottom that provided a flat surface for drip pan as well as controlling the heat flow. I put a can of beer at the entrance to the firebox and refilled it once or twice to provide additional moisture. I used the dual probe thermometer shown to the right.
I put one probe in each shoulder and it monitors the internal temperature of both on one device. Very nice!
The rest of the time was spent in putting in more charcoal and adding hickory chips about every hour. I kept the internal temperature at around 225-250f. About four hours into the process I swapped the location of the two shoulders on the grill and refilled the can.
At about 6-7 hours they were reading at 185-190F and were pretty much ready to come off the pit.
I pulled them off and let them sit for about half an hour. I pulled off the skin (more like leather at this point) and the fat underneath and then began to pull the pork apart with a fork and my fingers. This results in a fairly large bowl of shredded pork.
To make sure that it came out well, I had an onion bun and some apple cider vinegar and hot pepper sauce ready. I piled the pork on the bun and drizzled the sauce over it. It had a good smoky flavor that increased as we ate it over the next few days.
|
|
Easy Best Summer BBQ'd Chicken
Once again, no pictures (yet) |
|
| Recipe |
Recommended Products |
| This is the standard, barbecue sauce covered chicken that usually smells much better than it tastes because of the scorched and burnt skin and sauce that usually coats it. Properly done, it can taste as good as it smells.
There are two important things to understand about smoking
poultry. First, you must get the internal temperature of the
meat up to 165 degrees F. This means the dark meat as it cooks
the slowest. Putting a
Barbeque thermometer
temperature probe into the deepest part of the thigh is best.
Second, smoked poultry takes on a chemical change in the
process that turns the meat a reddish color, especially on the
surface. This doesn't mean the meat is raw, trust the
temperature probe. If you're at 165 degrees F in the thigh, it
is done. Check in a couple of places to be sure. Don't bank on
a rule of thumb like 30 minutes per pound. It can vary with
the heat of the coals, the efficiency of your 'que, the air
temperature and how often you open the lid. Remember if you're
lookin', it ain't cookin'.
What you'll need
Upright barrel style smoker/Grill
or Char-Broil Double Chef Water Smoker
Barbeque thermometer
Large bottle of Barbeque Sauce
Chicken
Toothpicks
Wood Chips
Small bowl for wood chips
Small bowl for barbeque sauce
Basting brush
Barbeque tongs
Optional:
Baster
Marinade injector
Start with good chicken, ideally fresh, not frozen. You can get a whole chicken and cut it up if you'd like, but that is a lot of mess and work. Start by cutting the breast into two or three sections depending on the size.
I find that
meat shears
are perfect for cutting apart the turkey quickly. What you're trying to achieve is approximately the same volume for all pieces to even cooking time. Keep the skin on and pin it in place with toothpicks as necessary. Separate the thigh and drumstick if necessary. Place on a cookie tray.
Pick a good barbeque sauce (I like Sweet Baby Ray's) or make your own, and pour a good amount over the meat. Work the sauce into the skin and especially under the skin. You can even try pouring or injecting it under the skin with a baster or marinade injector. Cover with plastic wrap and let the meat sit in the refrigerator for an hour or more. You can do this a day ahead if you'd like.
Start your coals with a coal starter. Wait until the flames are coming out the top and the coals are developing a good coating of ash. While you're waiting, take the top off your upright barrel style smoker
or what I'm now using the Char-Broil Double Chef Water Smoker, and remove the lower grill and water tray. Prep your top grill by cleaning it well (you do clean your grill, right!) and wipe it with a layer of vegetable oil on a paper towel. Soak a small amount of wood chips (apple and
cherry and
cherry work well) in a water bowl. Take the barrel portion of the smoker off the bottom section and when the coals are ready, pour them in. Place the barrel section back on and put the grill in place at the top and put on the lid. Let the temperature get up to a good level. The gauge needle should be about in the middle. Set a small table next to the smoker/grill to set the barbeque thermometer base on as well as sauce and other accessories.
Remove the chicken from the refrigerator, insert the probe of a barbeque thermometer into the thickest meat on a thigh. Don't hit the bone! Remove the smoker lid and use tongs to arrange the meat on the grill. Put the thicker pieces towards the middle where the heat will be concentrated more. Replace the top. Insert the end of the probe into the barbeque thermometer base. Press and hold the buttons on both the base unit and remote until the remote shows the temperature of the meat. Set the barbeque thermometer remote to the chicken setting. Note: the setting says 180 degrees F, this is much to hot as the chicken will continue to cook and will be dry and tough. I let it go to 165 degrees F and then take the chicken off the heat, it will be cooked thoroughly.
Drain your wood chips. Add a small amount (two or three tablespoons) of the damp wood chips the coals via the small side door. Repeat this 3 or 4 times during the first hour. After that the smoke won't make much difference as you've saturated the meat with it.
After about 30 minutes, pour about a cup of barbeque sauce into a small bowl. Open the lid of the smoker/grill, using your barbeque tongs, turn each piece of chicken over. Use a basting brush to brush a light coat of sauce on the chicken. Replace the lid. Turn the chicken about every 30 to 45 minutes until the barbeque thermometer remote reads 165 degrees F.
Remove the chicken from the grill with the barbeque tongs. Let sit for at least 10-15 minutes before serving. The chicken should be dark red from the sauce, smoke and heat, but not blackened or burnt. This is the stuff you smell during the summer in the neighborhood, but are disappointed by because of the high external carbon content.
Serve with more barbeque sauce on the side.
|
|
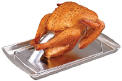
Easy Smoked Turkey for any
Occasion
|
|
|
Recipe |
Recommended Products |
| This
turkey will work on your Thanksgiving table, on the picnic
bench or chop it up and freeze it for sandwiches. It is easy,
tasty and all the meat stays moist if you use the Turkey Cannon.
There are two important things to
understand about smoking poultry. First, you must get the
internal temperature of the meat up to 165 degrees F. This
means the dark meat as it cooks the slowest. Putting a
Barbeque thermometer
temperature probe into the deepest part of the thigh is best.
Second, smoked poultry takes on a chemical change in the
process that turns the meat a reddish color, especially on the
surface. This doesn't mean the meat is raw, trust the
temperature probe. If you're at 165 degrees F in the thigh, it
is done. Check in a couple of places to be sure. Don't bank on
a rule of thumb like 30 minutes per pound. It can vary with
the heat of the coals, the efficiency of your 'que, the air
temperature and how often you open the lid. Remember if you're
lookin', it ain't cookin'.
What you'll need
Upright barrel style smoker/Grill
Turkey Cannon
Barbeque thermometer
14-22 lb Turkey
1-3 cubes of salted butter
3 tablespoons of sage
1-2 tablespoons of chopped onion and/or garlic
1 chopped onion
Wood Chips
Small bowl for soaking wood chips
Basting brush
This one
involves some preparation, but it is worth it. I have not
noticed a big difference between fresh or frozen turkey. Find
a good deal, buy a couple and keep them in the freezer. I get
the largest I can so there are more leftovers for freezing. Thaw your
turkey as necessary, usual safety tips apply. Best way is in
the refrigerator over several days if you have room. I have a
separate refrigerator downstairs that I use for storing
barbeque items needing refrigeration, beer and enough room for
thawing and marinating meat.
Once the turkey is thawed, remove from wrapper and remove all plastic
thingies (temperature popup and leg holder), remove the giblet
bag (I cook these up for the dog). Rinse off the turkey inside
and out and pat dry with paper towels.
Soften a cube of salted butter in the microware (about 10 seconds) and
mix in a tablespoon of ground sage. Now comes the messy part.
Use a wooden long handled spoon to get under the skin at both
ends, top and bottom. Loosen the skin gently, don't poke
holes. I then put a about a tablespoon of butter/sage mix on
one side and rub along the skin to spread it. Do this on both
sides, top and bottom, front and back. Try and get the butter
into the legs and first section of the wing. You may need to
get your fingers under the skin to assist. Then rub the rest
of the butter/sage mix onto the outside skin of the entire
turkey.
 The turkey is basically ready to cook. You can put it right on the metal
grill, but I prefer using a Turkey Cannon The turkey is basically ready to cook. You can put it right on the metal
grill, but I prefer using a Turkey Cannon .
Basically it is a nice variation of beer butt cooking. The
meat stays moist during the long smoking process. Instead of a
beer can, the long shaft of the cannon hold liquid and
disperses it through the holes while holding the turkey
securely. I use a good beer with lots of hops, a hoppy IPA is
a good bet. I pour it into a mixing bowl, add a teaspoon of
sage and some chunks of finely diced onion and/or garlic,
about a tablespoon. Put the turkey cannon onto a large tray.
Pour the mix into the cannon until full. Place the turkey on
the cannon, head end first so the legs are pointing down. If
possible, drape skin over the open end at the back of the
turkey to contain the steam more. Put the turkey on the cannon
into the refrigerator. .
Basically it is a nice variation of beer butt cooking. The
meat stays moist during the long smoking process. Instead of a
beer can, the long shaft of the cannon hold liquid and
disperses it through the holes while holding the turkey
securely. I use a good beer with lots of hops, a hoppy IPA is
a good bet. I pour it into a mixing bowl, add a teaspoon of
sage and some chunks of finely diced onion and/or garlic,
about a tablespoon. Put the turkey cannon onto a large tray.
Pour the mix into the cannon until full. Place the turkey on
the cannon, head end first so the legs are pointing down. If
possible, drape skin over the open end at the back of the
turkey to contain the steam more. Put the turkey on the cannon
into the refrigerator.
Start your coals with a coal starter. Wait until the flames are coming out the top and the coals are developing a good coating of ash. While you're waiting, take the top off your upright barrel style smoker
or what I'm now using the Char-Broil Double Chef Water Smoker and remove the lower grill and water tray. Prep your top grill by cleaning it well (you do clean your grill, right!) and wipe it with a layer of vegetable oil on a paper towel. Soak a small amount of wood chips (apple and
cherry work well) in a water bowl.
Fill the water tray almost to the top with warm water, add a
chopped onion and about a tablespoon of ground sage. Take the barrel portion of the smoker off the bottom section and when the coals are ready, pour them in. Place the barrel section back on,
add the full water tray carefully, and put the grill in place at the top and put on the lid. Let the temperature get up to a good
225 degrees or so. The gauge needle should be about in the middle
or well into the smoking section. Set a small table next to the smoker/grill to set the barbeque thermometer base on as well as sauce and other accessories.
Remove the turkey from the refrigerator, insert the probe of a barbeque thermometer into the thickest meat on a thigh. Don't hit the bone! Remove the
turkey from the tray and place the cannon on the grill. Replace the
smoker lid. Insert the end of the probe into the barbeque thermometer base. Press and hold the buttons on both the base unit and remote until the remote shows the temperature of the meat. Set the barbeque thermometer remote to the
turkey setting. Note: the setting says 180 degrees F, this is much to hot as the
turkey will continue to cook after you remove it from the
heat and could dry it out. I let it go to 165 degrees F and then take the
turkey off the heat, it will be cooked thoroughly.
Drain your wood chips. Add a small amount (two or three
tablespoons) of the damp wood chips the coals via the small
side door. Repeat this 3 or 4 times during the first hour
and about every half an hour after. The turkey will cook in
about 3-5 hours depending on the size, if you used a water
tray (will cook slower) and consistency of your heat.
Monitor the barbeque thermometer
after two hours to see how it is coming along. I usually
baste the turkey once or twice at about 145 and 160 degrees.
Once the turkey is done, remove
carefully from the grill and let sit for about 10-15 minutes to
let the juices settle. Remove the turkey from the cannon
carefully as it is hot and so it the liquid inside. Place
turkey on a carving board. You can either carve and serve or
cut it up and freeze it for later meals. I find that
meat
shears
are perfect for cutting apart the turkey quickly. We usually have
some for dinner, some for sandwiches and freeze the rest.
Another good reason for cooking a large bird!
|
|
Cedar Smoked
Salmon
|
|
|
Recipe |
Recommended Products |
| This
salmon recipe is easy and delivers a great smoky flavor every
time. What you'll need
Upright barrel style smoker/Grill
Barbeque thermometer
Salmon fillet or chunks of salmon fillet (Costco has
individually packaged salmon)
2 tablespoons of lemon juice
1-2 sprigs of chopped fresh dill
1-2 tablespoons sour cream (optional)
Wood Chips
or
Cedar Planks
Small bowl for soaking wood chips
Thaw the salmon as necessary. I like
to use skin on salmon fillets either cut in about 3 inch
pieces or about 12 inches long. Squeeze some lemon juice on
the salmon and sprinkle with chopped dill. Add sour cream if
you like it. Put salmon into refrigerator until ready to cook.
Start your coals with a coal starter. Wait until the flames are coming out the top and the coals are developing a good coating of ash. While you're waiting, take the top off your upright barrel style smoker
or what I'm now using the Char-Broil Double Chef Water Smoker and remove the lower grill and water tray. Prep your top grill by cleaning it well (you do clean your grill, right!) and wipe it with a layer of vegetable oil on a paper towel.
You can either use a cedar plank or scraps of untreated cedar
wood. I have a cedar tree about 5 feet from where I barbeque,
so I just strip a little bark off and use that. Soak the
plank, wood or
chips (cedar
is best, but apple and
cherry
work well) in a tray or bowl filled with water.
Take the barrel portion of the smoker off the bottom section and when the coals are ready, pour them in. Place the barrel section back on,
and put the grill in place at the top and put on the lid. Let the temperature get up to a good
225 degrees or better. The gauge needle should be about in the middle
or into the grilling section. Set a small table next to the smoker/grill to set the barbeque thermometer base on as well as other accessories.
Remove the salmon from the refrigerator, insert the probe of a barbeque thermometer into the thickest meat.
If you're using one, remove the cedar plank from the water
and place the salmon on the cedar plank skin side down.
Place the plank or the salmon (skin side down) on the grill. Replace the
smoker lid. Insert the end of the probe into the barbeque thermometer base. Press and hold the buttons on both the base unit and remote until the remote shows the temperature of the meat.
Add the wood chips to the coals at about 15 minute
intervals. Set the barbeque thermometer remote to the
fish setting. You may want to keep an eye on the salmon and
cook to taste, it is OK to have it a bit rare if it is a
good cut of salmon. Salmon will cook in about 15 minutes to
an hour depending on how close to the coals the salmon is,
if you are using a plank and if the skin is on. I prefer to
keep the salmon as far from the coals as I can and use a
plank to allow more smoke flavor to get to the meat.
When the salmon is done, remove from the grill or plank with a spatula.
I place it right on the serving platter and serve immediately.
Leftovers are good in scrambled eggs the next morning or mix
with some cream cheese for a nice smoked salmon dip.
|
|
Sugar and Whiskey Cured Smoked Salmon
|
|
|
Recipe |
Recommended Products |
| This
sweet and salty salmon recipe is easy and costs a lot less
than buying packaged smoked salmon. You can skip the whiskey
if you want to, but it does add flavor. I recommend Irish
Whiskey as it doesn't have the peat flavor of Scotch Whisky
and because I like it. What you'll need
Upright barrel style smoker/Grill
Barbeque thermometer
Salmon fillet or chunks of salmon fillet (Costco has
individually packaged salmon)
1 cup Irish Whiskey
1 cup brown sugar
1/2 cup sea salt
1/2 teaspoon of ground hot pepper
Wood Chips
or
Cedar Planks
Small bowl for soaking wood chips
Thaw the salmon as necessary. I like
to use salmon fillets with no skin either cut in about 3 inch
pieces or about 12 inches long. Put the salmon in a shallow
pan and pour the whiskey over it. Let soak for about a half an
hour turning occasionally. Mix the sugar and salt, add hot
pepper if desired. Drain salmon and pat dry. Clean pan and
sprinkle a light layer of the sugar and salt mix. Place salmon
on top and sprinkle the remainder of the mix on top. Let sit
for about 4 hours, the salmon should be more red in color and
very firm. Remove salmon from mix and wash clean in cold
water. Pat dry and replace in clean pan. Put salmon into refrigerator until ready to cook.
Start your coals with a coal starter. Wait until the flames are coming out the top and the coals are developing a good coating of ash. While you're waiting, take the top off your upright barrel style smoker
or what I'm now using the Char-Broil Double Chef Water Smoker and remove the lower grill and water tray. Prep your top grill by cleaning it well (you do clean your grill, right!) and wipe it with a layer of vegetable oil on a paper towel.
You can either use a cedar plank or scraps of untreated cedar
wood. I have a cedar tree about 5 feet from where I barbeque,
so I just strip a little bark off and use that. Soak the
plank, wood or
chips (cedar
is best, but apple and
cherry
work well) in a tray or bowl filled with water.
Take the barrel portion of the smoker off the bottom section and when the coals are ready, pour them in. Place the barrel section back on,
add the full water tray, and put the grill in place at the top and put on the lid. Let the temperature get up to a good
225 degrees. The gauge needle should be about in the middle
or into the smoking section. Set a small table next to the smoker/grill to set the barbeque thermometer base on as well as other accessories.
Remove the salmon from the refrigerator, insert the probe of a barbeque thermometer into the thickest meat.
If you're using one, remove the cedar plank from the water
and place the salmon on the cedar plank skin side down.
Place the plank or the salmon (skin side down) on the grill. Replace the
smoker lid. Insert the end of the probe into the barbeque thermometer base. Press and hold the buttons on both the base unit and remote until the remote shows the temperature of the meat.
Add the wood chips to the coals at about 15 minute
intervals. Set the barbeque thermometer remote to the
fish setting. You may want to keep an eye on the salmon and
cook to taste. Remember, this is smoking not grilling so
longer cooking times at a lower temperature is OK. Salmon will cook in about
45 minutes to
an hour depending on how close to the coals the salmon is,
if you are using a plank and if the skin is on. I prefer to
keep the salmon as far from the coals as I can and use a
plank to allow more smoke flavor to get to the meat.
When the salmon is done, remove from the grill or plank with a spatula.
I place it right on the serving platter and serve immediately.
Leftovers are good in scrambled eggs the next morning or mix
with some cream cheese for a nice smoked salmon dip.
|
|
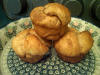
Cinnamon Rolls
 |
|
|
Recipe |
Recommended Products |
| There is no
relation to barbeque, but these are a nice finishing dessert. These
are not the gooey sticky cinnamon rolls you find at the mall
or in tins at the store. These are yeasty more solid rolls
busting with buttery cinnamon sugar goodness. They are tasty
hot or cold. Ingredients
?2 cups warm water (use instructions on yeast for correct
temperature, about 120 degrees F)
?2 packages of active dry yeast or equivalent
??cup of white sugar
??cup butter
?1 egg
?2 tsp. salt
?6 ?to 7 cups unbleached flour or bread flour
Substitutions:
?Reduce water by one cup and use a cup of buttermilk, adding
it with the butter.
?May substitute margarine for butter
?May use brown sugar instead of white
?May substitute 1 cup of white flour for whole wheat
Directions
?Measure water into large warm mixing bowl. Sprinkle in yeast
and 1 tbsp. white sugar and stir until dissolved.
?Let sit 2-3 minutes until yeast begins to froth.
?Add sugar, butter, egg, salt and half the flour.
?Beat until smooth.
?Mix in remaining flour until dough is easy to handle and
smooth and elastic (about 5 minutes). Knead either by hand or
machine with dough hook.
?Place in lightly greased bowl and turn to grease all sides.
?Cover loosely with plastic wrap (not foil).
?Refrigerate at least 2 hours.
?When dough rises, punch it down occasionally.
?Dough will keep for up to 5 days in the refrigerator.
Cinnamon Roll Ingredients
??cup butter
??cup white sugar
?1 ?tsp. cinnamon
?1 or 2 muffin tins, lightly greased
Directions
?Melt 1/3 cup butter in a pan.
?Make cinnamon sugar with ?cup white sugar and 1 tsp. or
more cinnamon to taste)
?Preheat oven to 400 degrees F
?Pinch off a wad o dough and roll between palms until about
a finger width and about 8 inches long.
?Roll dough in butter, coating completely.
?Roll dough in cinnamon sugar until coated.
?Tie dough stick in a knot and tuck ends under.
?Place each dough knot in lightly greased muffin tin.
?Place muffin tin in warm spot and let rise until about
double in size.
?Place muffin tin in oven for about 12 minutes or until sugar
caramelizes.
?Remove muffin tin and place on rack to cool.
?Tip each roll with a knife to allow steam to escape.
Makes between 24-36 rolls depending on size
|
|
|